Positioning the Insertion Point
Basic Positioning
Positioning the insertion point works much the same in TypeMetal as it does in most other text editing apps — but, since an HTML document is structured like a tree instead of as a "flat" run of characters, there are some important nuances it will help you to understand.
Positioning at the Edge of an Element
The tree-structured nature of HTML, where elements and text are nested inside other elements, creates an ambiguity at the edge of an element. Consider the following bit of content:

which corresponds to the following bit of HTML:
a <strong>big</strong> ideaSuppose you click at the right edge of the word “big” in the editing area. Should the insertion point land inside the <strong> element that wraps the word “big”, or outside the <strong> element? The difference matters, because it determines whether any typing you then do will be inserted inside the <strong> element or outside it.
When you click to position the insertion point inside text, TypeMetal always puts the insertion point as deep in the element tree as possible. So in this case, clicking at the end of the word “big” would put you after the “g”, but still inside the <strong> tag. Whatever you type next will therefore go inside the <strong>. If you want to move the insertion point outside the <strong> element, you can get there easily by:
- pressing the → key to exit the element (see the explanation in “Traversing Element Boundaries”, below)
- pressing the Esc key to exit the element (see “Exiting an Element”, below)
- pressing the Tab key, which exits the element and adds a space, all in one keystroke
Traversing Element Boundaries
When you move the insertion point through some text using the ← and → keys, and cross an element boundary like the one discussed above, TypeMetal's selection model treats the the position inside the element and the position outside the element as two distinct positions, and moves to each of them in succession.
Suppose you start with the insertion point just to the left of the “g” in the word “big”, in the example above. For successive presses of the → key, the insertion point will move to:
- after the "g", but still inside the <strong> element
- after the "g", but outside the <strong> element
- after the subsequent space
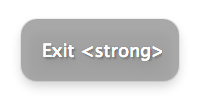
Since these two distinct positions appear to be in the same place, TypeMetal provides visual and audio cues to help you know when you’ve crossed an element boundary. You’ll hear a sound and see a briefly appearing notification bezel that looks like this:
Exiting an Element
When you’re done typing the content that goes inside an element, you’ll want to get out of the element so you can continue typing what goes next.
Pressing Esc will put you just outside the enclosing element, with no interceding whitespace. (This corresponds to Structure → Exit Element.)
Often, you’ll want to leave a space before you continue typing. Pressing Tab exits the enclosing element and leaves a space between its end and the insertion point, leaving you ready to continue typing in one keystroke. (This corresponds to Structure → Exit Element (and Insert a Space).)
Selecting a Range of Content
Range selection works much the same as in text editing apps. You can drag the mouse to select a range of content. Or, you can hold down the Shift key and press the arrow keys to select content using the keyboard.
More Selection Helpers
TypeMetal’s “Show Block Structure” mode makes invisible block-level HTML elements graspable, and is designed to help you get hold of elements you want to select, while more easily visualizing and manipulating the block-level structure of your document.
The path bar is your friend, too. Its elements can be selected and operated on with a convenient click.